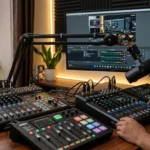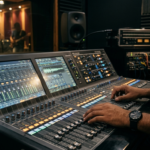
Live streaming is a powerful way for musicians, podcasters, gamers, teachers, performers and other content creators to reach their audiences in real time. As a bare minimum, all you need is a camera and a computer, but a streaming mixer makes multi-microphone, instrument, background music, and other sources much easier to manage.
A mixer gathers multiple audio sources, balances them and outputs a unitary audio signal to your streaming setup. YouTube even states that encoder-based streaming can use external video and audio hardware, including mixers and multiple microphones.
Follow this guide to learn how to use a streaming mixer for live streaming.
What Is a Streaming Mixer?
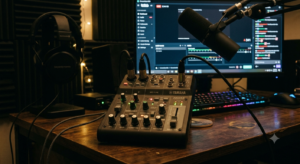
A streaming mixer is an audio device that combines and controls multiple sound sources before they are sent to a computer or stream encoder. A mixer may allow you to connect:
- Microphones
- Musical instruments
- Smartphones or other music players
- Computers
- Headphones
- Speakers
- Audio interfaces
- Other line-level equipment
For example, a musician could connect one microphone, one instrument and background music to three different mixer channels.
The main advantage is the ability to adjust each input separately instead of using a single, combined signal.
Equipment You Will Need
Before connecting your mixer, gather together all the equipment needed for your setup. A simple arrangement might include:
- Streaming mixer
- Microphone
- XLR or other compatible audio cable
- Headphones
- Computer or another streaming device
- USB cable or external audio interface (depending on your mixer)
- Streaming or encoder software
- Camera or webcam
You might also require instrument cables, adapters, headphones and monitoring equipment. YouTube states that professional live streams may use multiple cameras, microphones, mixers and hardware encoders. Simpler streams can use additional cameras and microphones.
Steps to Use a Streaming Mixer for Live Streaming

Step 1: Connect Your Microphone or Instruments
Your main audio sources first go into your mixer channels.
Example:
Microphone Mixer Channel 1
Guitar Mixer Channel 2
Computer/Background Music – Mixer Channel 3
If your microphone is a condenser, check that your mixer provides the necessary phantom power supply, activating it only if required. Do not connect or disconnect equipment while activating phantom power unless otherwise instructed in your equipment’s documentation.
Step 2: Connect the Mixer to Your Streaming Equipment
Once your audio sources are routed to a mixer, the audio needs to go to your streaming setup.
Many modern mixers provide USB connections, allowing them to directly communicate with a computer.
Other systems may require you to plug the mixer’s outputs into an external audio interface or streaming device.
After connecting, open your streaming software and select the mixer or interface as the input source. Consult your mixer or software’s documentation if you encounter difficulties selecting the input device.
Step 3: Set the Input Gain
One of the most critical controls on a mixer is gain.
What is gain? – Gain refers to the strength of the incoming audio signal. If set too low, your audio may come across as too quiet.
If set too high, it could cause distortion or clipping.
Ask your participant to produce audio at the level they would during your stream. Then slowly increase the gain until reaching a point where the signal is strong but does not distort or clip. The key is to find the best balance that can then be refined through volume controls. Remember: gain is not volume.
It controls the level of incoming audio, while volume controls the level of the audio output to the stream.
Step 4: Adjust Your Channels
With your gain set, you can now bring up the volumes of your various channels.
Suppose you are hosting a live music session; you check:
- All microphones at the same level
- Guitar slightly below the singer
- Background music lower than the singer
- Interviewer microphone depends on speaking volume
Again, these are only suggested starting points.
Your optimal settings will depend on the microphone, space, participant, and content.
Step 5: Use EQ Responsibly
EQ controls on a mixer allow you to alter a range of frequencies. Many mixers provide controls for bass, mid-range and treble. When it comes to speech, the aim usually isn’t to manipulate those sounds to make them more pleasing but to ensure they are as clear and natural as possible.
In the case of music, EQ can help balance vocals with instruments.
Don’t go overboard on the EQ for your connection, or you’ll get excessive processing through the monitor. Instead, make small adjustments and listen to your audio setup.
Step 6: Monitor with Headphones
To monitor your output, plug in headphones. Headphones can reveal:
- Background hum
- Feedback
- Excessive bass or treble
- Unwanted noise or computer input
- Other channels are too loud or quiet
Now try a test run to confirm that you can hear all sound sources.
YouTube recommends using some kind of software or hardware monitor to test your setup. As a side note, YouTube states: “Encoder-based streaming can use external audio and video hardware, such as multiple cameras, microphones and mixers.”
Step 7: Configure Your Streaming Software
Depending on your streaming software, you may need to specify the input device you want to use.
You should be able to see levels in your software when your participant sings or plays.
To be sure that your audio is arriving correctly, make a private or unlisted recording, or for YouTube, run a private stream and listen to it later. YouTube recommends, “A streaming device using an external audio or video hardware encoder can send live streams to YouTube, which can combine external hardware with its own video sources.”
The platform recommends AAC or MP3 audio for RTMP/RTMPS streams, with 128 Kbps stereo audio as a suggested setting.
Step 8: Check Internet Stability
No mix of equipment can fix an unstable internet connection.
Speed test your connection before streaming, and allow some extra bandwidth compared to your target.
YouTube recommends keeping 20% extra bandwidth reserved “rather than maxing out upload speed.”
For example, YouTube’s stated recommended H.264 bitrate at 1080p 30 fps is 10 Mbps, and at 720p 30 fps it is 4 Mbps. Your machine should be able to handle this load smoothly with some room to spare.
Common Mistakes to Avoid
An inefficient mixer can result in poor punches even if it is of good quality, so be sure to avoid these mistakes:
Overdriving the amp: This results in clipping and distortion.
Monitoring neglect: Issues may only be identified when viewers notice them.
Playing loud music: Background music should not drown out speech.
Skipping a test stream: Always do a dry run of all your signal pathways before an important final broadcast.
Too much use of effects: Effects like reverb, compression and EQ should serve the content and not be a gimmick.
Missed the computer audio: If you have videos, music or remote guests, make sure all sources are selected.
Select the Perfect Audio Tools with Amrit Music
Are you creating a live-streaming, recording or performance configuration? It is preferable to have professional audio equipment. Amrit Music has been in the music business for over 50 years and supplies musical instruments and audio equipment to musicians as well as to other users. Its online store has listings for various categories and products like microphones, amplifiers, mixers, microphones and a great deal more.
Amrit Music has partnered with existing brands such as Yamaha, Roland, Fender, Casio, Marshall, Zoom and Boss. The audio equipment range could be handy for those setting up a home recording or live performance.
Anyone designing a streaming system should compare the number of channels, connectivity, microphone compatibility, USB features, outputs, monitor options and purpose, not just make the decision based on the look or the cost of the mixer.
Contact us at 0172-4545490 or email info@amritmusic.com for further queries.
Final Thoughts
An ordinary mixer can be used for your live audio, but with a streaming mixer, you have a lot more control over your broadcast. With the mixer, you can connect your mics and instruments correctly, add gain, balance your channels, monitor through headphones and set up your streaming software.
The most critical aspect of streaming is ensuring that the whole signal chain works – prior to turning on air. Your PC, mixer, mic, internet, streaming software – and more – must all work seamlessly together. From a simple talking-head format to multi-mic musical productions, you can create a streaming setup that will meet your needs from the most reputable music equipment supplier like Amrit Music.
Frequently Asked Questions
What is a streaming mixer?
A streaming mixer manages and blends audio sources that assist in making the stream clear.
Is your streaming mixer good for live stream?
A streaming mixer offers independent control of the volume of your microphone, music, and other instruments.
Can I use a streaming mixer with a microphone?
Yes, you can use a microphone. All the streaming mixers that we tested did support a microphone, and you have control over the volume and the other audio controls.
Do I need a streaming mixer for streaming?
You do not need a streaming mixer in every scenario, but it can be helpful to have if you require several sound sources.
Can you live stream with a streaming mixer?
Yes, it is. You can use a streaming mixer when you want to mix background music, instruments, and vocals in a live stream.